

Fair Progression
Plan your build with absolute confidence.

No Pay-to-Win

Rewarding Progression

Systems With Purpose
Pure Skill Duel
Pure Skill Duel
Your real weapon is your real skills — and one equation for everyone.
Inside the arenas all of your equipment works at its true fixed value: a +0 piece reads at the top of its upgrade line, and your equipment values read at one announced cap for everyone — the difference is your choices and your tactics.
Everything you built outside the arenas — upgrades and gains — stays exactly as it was: nothing is touched.
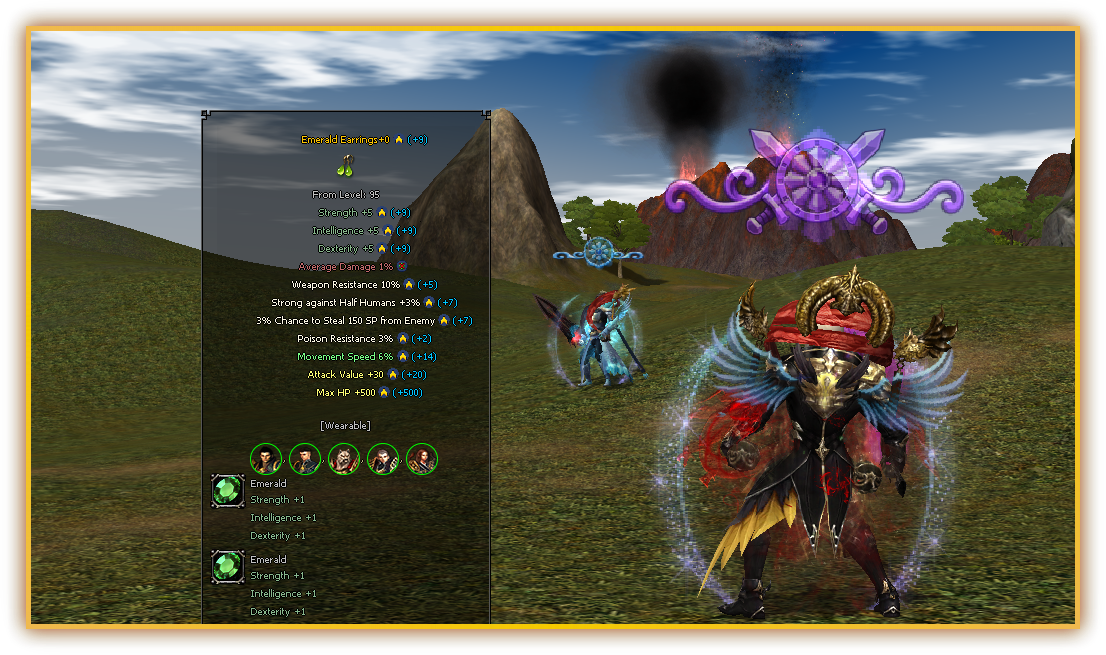
Door One: Pure Skill — the open map
Open to everyone from the village: a high base HP (271,000), death without penalty, and leaving by any means returns you to the exact spot you departed from.
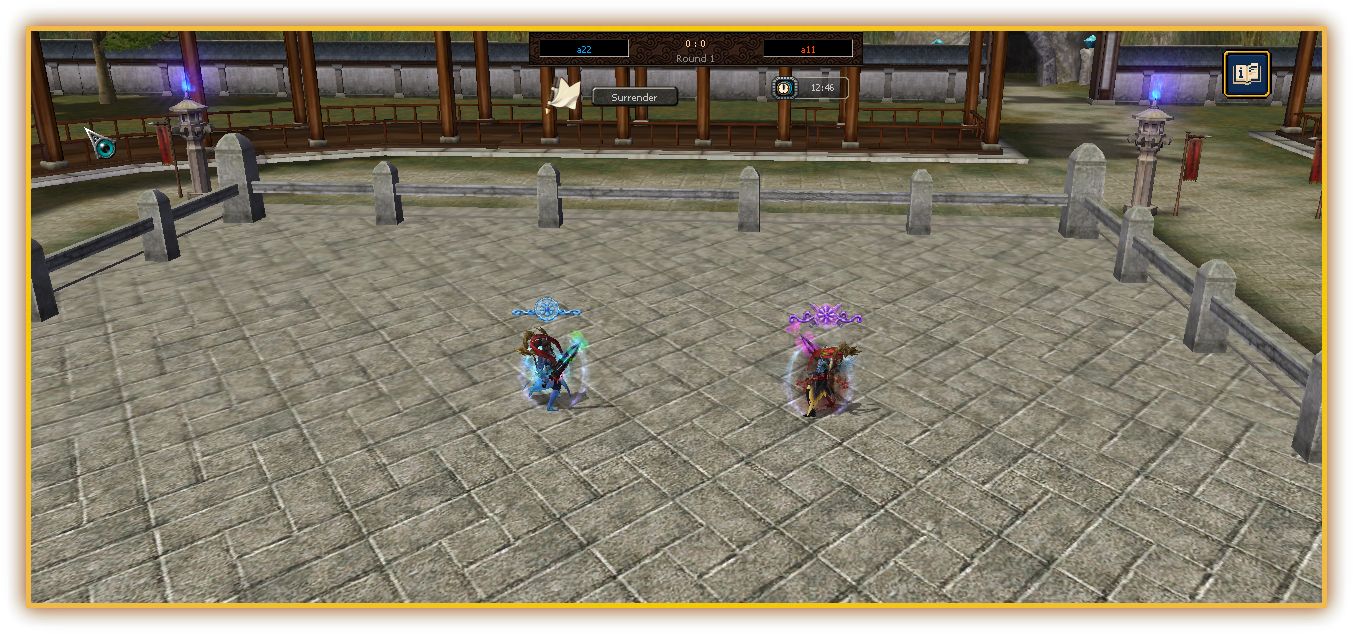
Door Two: the duel arenas
Isolated official duels: laws picked by the challenger, rounds, points and a scoreboard, spectators in a safe stand, and a fair queue when full.
The neutralized bonuses
The rule: inside the arenas, every bonus that alters a strike's course from outside the player's hand is neutralized. What remains and works: your gear at the top of its class, your skills, your tactics.
| Bonus | Its state inside the arenas |
|---|---|
| Chance of Critical Hit | Neutralized in this mode so duels are decided by consistent play, not a single strike |
| Chance to block a close-combat attack | Neutralized so every strike's outcome stays direct and visible between the two duelists |
| Chance to Dodge Arrow Attacks | Neutralized under the same logic: a strike's result is direct between the two sides |
| Poisoning chance (item procs) | Its item sources are paused inside the arena — skill poison works as usual |
| Bleeding attack (item procs) | Under the same logic: its item sources are paused inside the arena |
| Chance to Reflect Melee Attacks | Neutralized so the duel stays a direct exchange between the two players |
| chance to block attack damage | Neutralized so every strike's result reads directly before your eyes |
| Chance for Piercing Hit | Its gear adds are paused inside the arena, and the ruleset grants everyone one fixed value (500) |
| Defense Bonus % | Neutralized to preserve the unified piercing equation for everyone |
| Skill Damage | Its gear adds are replaced by the ruleset's announced values per class and branch — fixed values everyone knows in advance |
| Average Damage | Under the same logic: the announced ruleset values apply instead of gear adds |
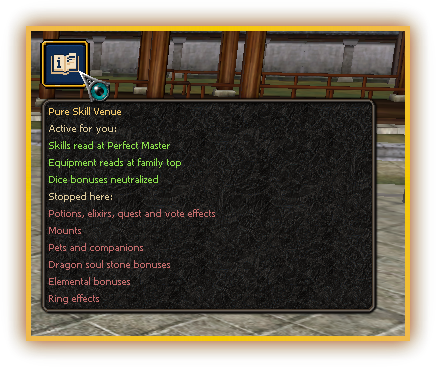
Allowed and forbidden in the arena
Allowed for you: your gear reads at the top of its class.
Stopped here: potions, elixirs, quest and vote effects; mounts; pets and companions; dragon soul stone bonuses; elemental bonuses; ring effects.
The duel cycle, from challenge to return
- The challenge: a "Pure Skill Duel Challenge" card arrives — accept it or decline it.
- Transfer to a free arena — up to 16 simultaneous duels, with a fair queue when full.
- Duel laws: 3, 5, or 7 rounds, or Open (first to 10 wins, or best after 15 minutes).
- "I am Ready": the opponent confirms the laws before the start.
- The round: fully isolated combat — no third party enters, and no potions during the match.
- On death: 7 seconds to show the result, then a full auto-revive at your start point.
- The end: the result is announced with the blue/red board, then 30 seconds and both return to the exact spot of the challenge.
- Surrender is available anytime via a button with confirmation on the scoreboard.
The system's promise
- Everything you built outside the arenas is untouched — exactly as you left it.
- No experience loss, no drops, and no durability wear inside the arenas.
- Leaving by any means returns you to the exact spot you departed from.
- One equation for everyone: two identical copies exchanged strikes and ended at exactly the same HP.
Pure Skill Duel runs its premiere for a limited window — upcoming availability details are announced here first.
Your First Login, Everything Ready
From the moment you log in, you are ready for adventure. No grinding for basic items. No empty inventory. Everything you need to begin your journey is already in your hand — permanent elixirs, 10-days Turbo Surfboard, 10-days costume set, and a legendary quest that guides you every step of the way.
What You Start With
Your complete starting inventory — permanent elixirs, 10-days costumes and Turbo Surfboard, utility items, and tutorial equipment. Tap any icon for details.


Walk Through Monsters

EXP Control

Full Starting Wardrobe

Common Skills Maxed

Legendary Allies

Horse from Level 1

Monster Transformation
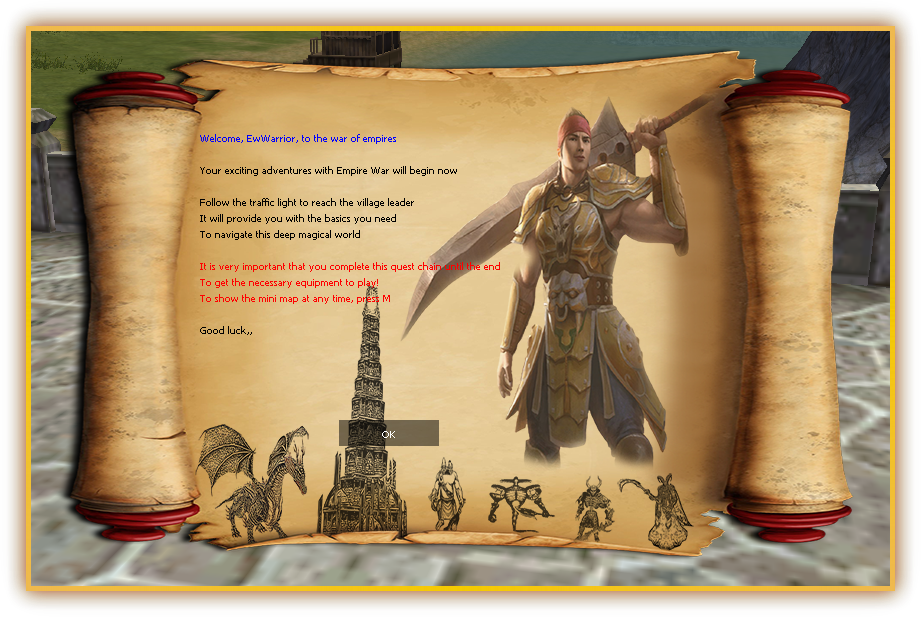
The Legendary Chain — Your Built-In Guide
Your adventure begins with a legendary quest chain that spans from level 1 to level 50. This is not just a series of tasks — it is your personal tutorial.
The legendary chain:
• Teaches the game: Takes you to every important NPC, every key system, every major area
• Provides starting equipment: Core gear and tools that give you a real foundation
• Guides naturally: the story itself shows you where to go and what to do
• Rewards massively at Lv50: A significant EXP burst that propels you into the mid-game
Choose Your Path
Three empires shape the continent: Shinsoo, Chunjo, and Jinno. Each has its own starting zone, lore, and culture. Choose your empire, then choose your class.
Five distinct character types offer radically different playstyles — from the frontline Warrior to the stealthy Ninja, the dark arts of the Sura, the magic and support of the Shaman, and the primal ferocity of the Lycan.

Warrior

Ninja

Sura

Shaman

Lycan
Deterministic, Fair, Flexible
Character growth is deterministic and fair. No random HP rolls on level-up. No guessing stat allocation. Every player follows the same clear path — and can always change direction.
Stats cap at 90. currently. You can reset stats and switch specializations freely between levels 5-30, and with items beyond that in anytime.

Fixed Skill Points

Stat Reset

Free Spec Switching

Skill Color (Subscriber)

Skillbook

Emperor System
Skill Progression Path
Your skills grow through clear, rewarding stages. No frustrating grinding — every milestone feels meaningful.
| Stage | Level | How to Unlock | What Happens |
|---|---|---|---|
| Auto Skill Selection | Lv 5 | Choose specialization instantly | Pick your skill group without visiting teachers. Mining, Leadership, Polymorph, and Combo granted at max. |
| Skill Quest | Lv 17 | Quest | One skill instantly reaches Perfect Master. Previously used skill points are refunded to complete the process. |
| Master (M1) | 16 points | Automatic at 16 skill points | Skill is promoted to Master rank. Then use Auto Skill Reader (F7) to read books automatically. |
| Grand Master / Perfect Master | M1+ | Auto Skill Reader (F7) + Soul Stones | Automatic Soul Stone reading via F7. Progress to Grand Master then Perfect Master. |
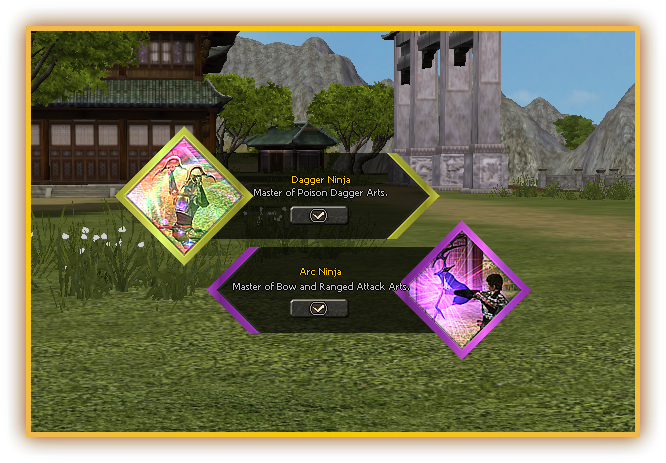
Auto Selection
Upon reaching level 5, the selection window opens automatically: choose your specialty directly and start developing its skills right away.
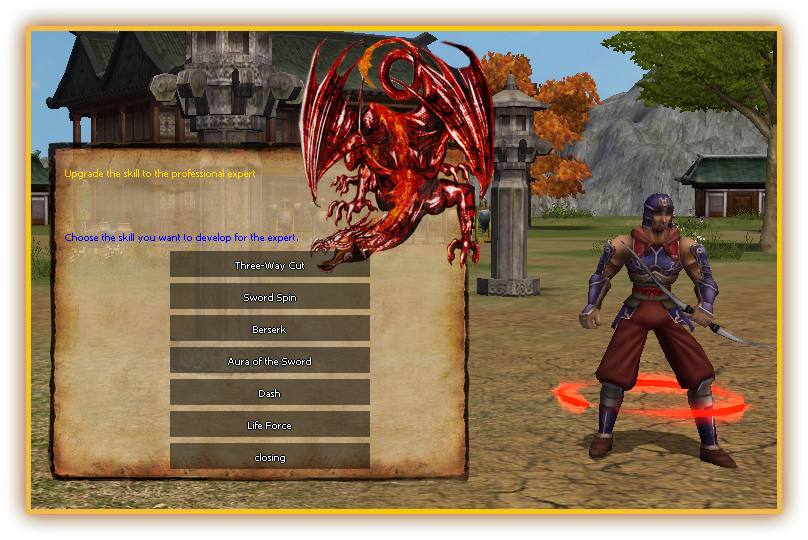
The Level 17 Skill Quest — One Skill, Instantly Mastered
At level 17, a special quest transforms how you approach skill development. Instead of reading dozens of skill books over weeks, you can instantly bring ONE chosen skill to its maximum Professional level.
How it works:
1. The quest triggers automatically at level 17
2. Choose any one of your combat skills
3. That skill jumps immediately to Perfect Master — skipping the book\Stone-reading phase
4. Any skill points invested in other skills are refunded
5. This is a one-time benefit — choose wisely
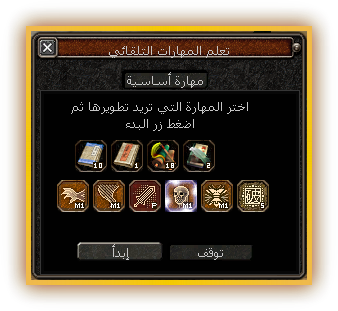
Auto Skill Reader (F7)
One press of F7 opens the Auto Skill Reader window: pick a skill and the game reads Skill Books and Soul Stones for you — from Master rank all the way to Perfect Master, with no teachers and no manual clicking.
Legendary Dragon Books and Skills
The Legendary Dragon Books — Life / Attack / Defense / Experience / the Legendary Dragon — have become skills that develop as independent skills through the Dragon Books. Press V to find them in blue.
They work permanently and are never redistributed with regular skills; the book alone raises their value — no spiritual stones, no status points — and there is no wait between books (no Exorcism Scroll needed).
FARM METINS → A BOOK DROPS → READ IT → SKILL CLIMBS (EASY 10, INTERMEDIATE M, DIFFICULT G, LEGENDARY P):
• Metins 5-35: easy and intermediate books.
• Metins 40-65: intermediate and difficult.
• Metins 70-90: difficult and legendary.
Surplus? Drag the book outside the inventory and press Extract → Research Paper → trade it for guaranteed yang with Ling Dao (the Specialization Sage) via Skill Research.
The Emperor is the elected leader of an empire — a position of real power over the entire realm.
Your candidacy fee goes straight into your empire's treasury if you win the election — and is fully refunded if you don't. Once elected, the Emperor gains commands and powers that serve the entire empire: health restoration, attack and defense boosts, and boss summoning.
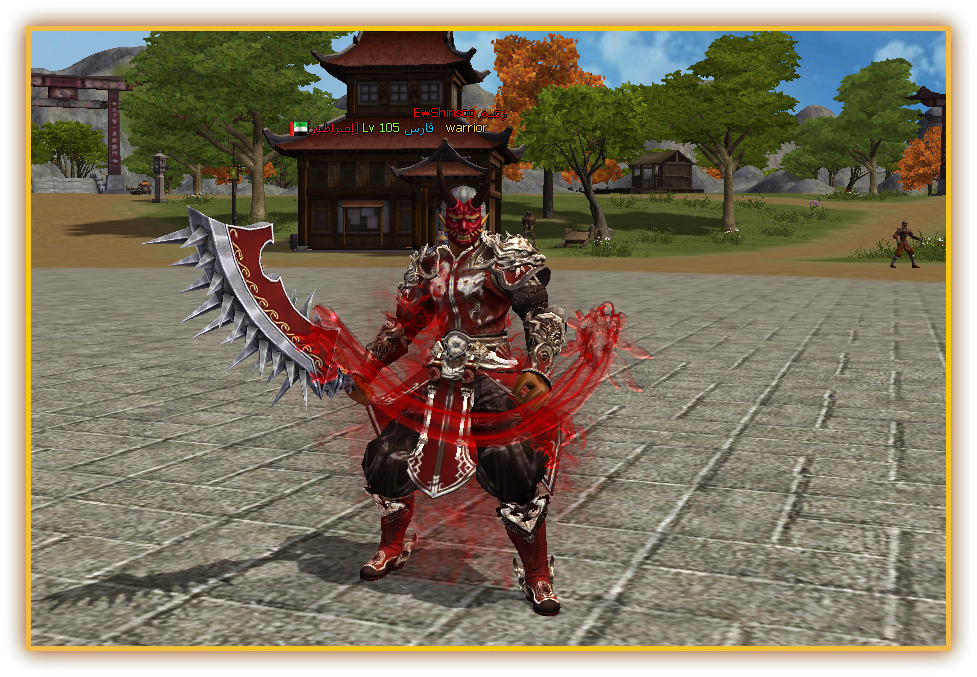
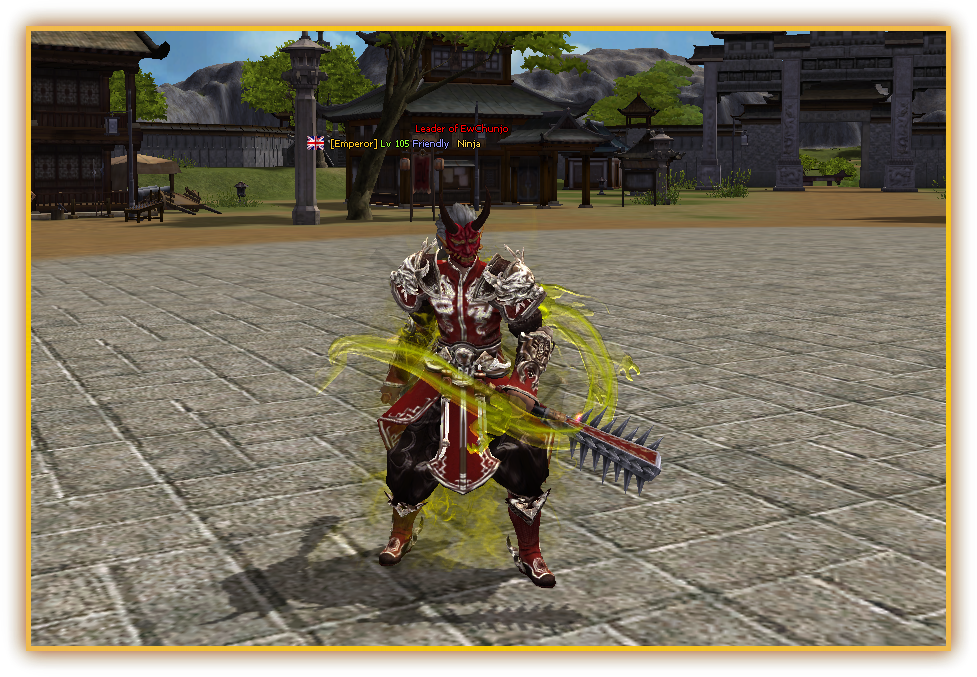
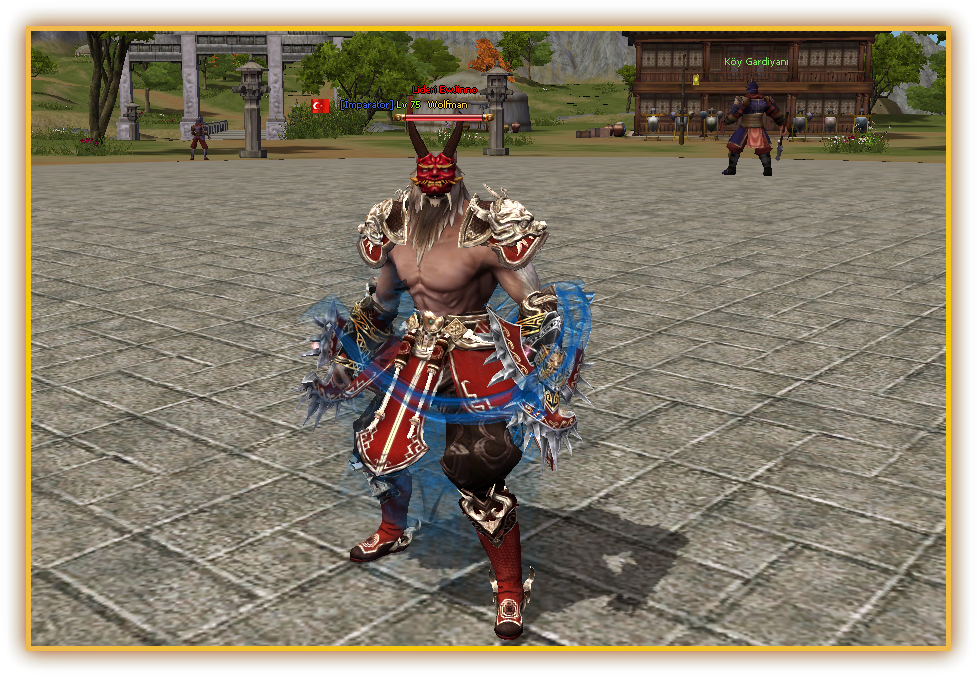
The Emperor's title appears above his name and in chat with a title unique to his empire, visible to all players and crowned with striking visual effects. A dragon aura and dragon effect in the empire color accompany him at all times, and he wears a distinctive armor of his own.
Managing the empire's affairs and leading it to victory rests on the Emperor's shoulders — the game administration counts on him for exactly that, and selects him with the utmost care. Any aggressive conduct unworthy of the imperial office means he is replaced by someone deserving of the leadership.
The Emperor also has a full presence on the official website: complete statistics, a special title in the ranking list, and his name displayed on the website interface alongside empire treasury information.

Emperor Blessing

Attack Boost

Defense Boost

Boss Summon

Empire Notice

Warp & Transfer

Golden Frogs Event
The Emperor's Armor — Each Empire, Its Own Majesty
The emperor-exclusive armor with a dragon effect in his empire's color and his unique title: red Shinsoo, yellow Chunjo, and blue Jinno.
Ten Slots, Seven Layers of Power
Your character wears ten equipment types — weapon, helmet, armor, shield, earring, bracelet, necklace, shoes, belt, and pendant. Nine of these can hold bonus attributes (the belt uses the accessory-socket system instead).
How bonuses stack:
• Slots 1-5: Normal bonuses — Slots 1-4 via Reinforce Item, adding all 4 bonuses at once. Slot 5 via Blessing Marble, requiring the 4 existing bonuses to be filled first.
• Slots 6-7: Epic bonuses — require all 5 normal slots to be filled first. Managed at Ling Dao.
Bonuses are changed via Enchant Item. Reinforcement and Enchant Item drop from bosses and Metin stones, and can be crafted through Ling Dao using the Research Paper.
Two fixed server rules: all equipment drops from normal monsters at +6 and above, and all merchant-sold equipment comes at +9.
The Bonus Hierarchy
Not all bonus slots are created equal. Each layer requires different tools and investment.
| Layer | Slots | Tool | Rarity | Effect |
|---|---|---|---|---|
| Base | 1-4 | Reinforce Item | Common | Standard bonuses |
| 5th Bonus | 5 | Blessing Marble | Rare | Adds a standard bonus from the same pool as bonuses 1-4. Requires all four slots filled first. |
| 6th/7th (Epic) | 6-7 | Fragments + support items | Endgame | Unique epic bonuses — some double and reinforce your standard bonuses, others are dedicated to empowering skills with high values. Available at Ling Dao. |
The Standard Bonus Table — Slots 1-5
Tools Carrying Bonuses
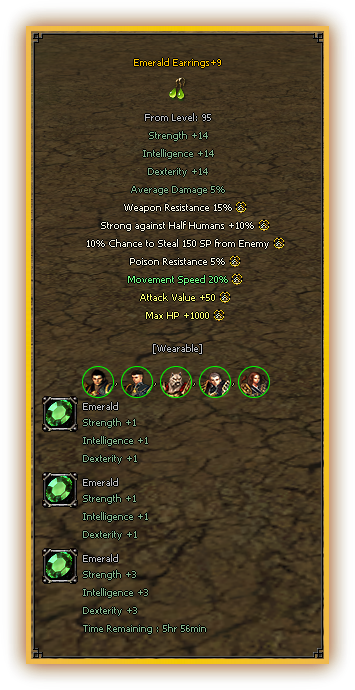
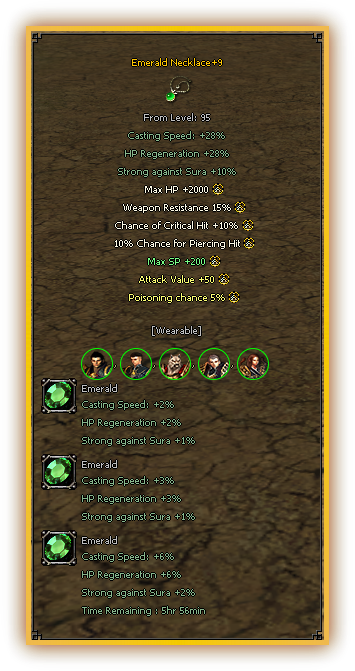
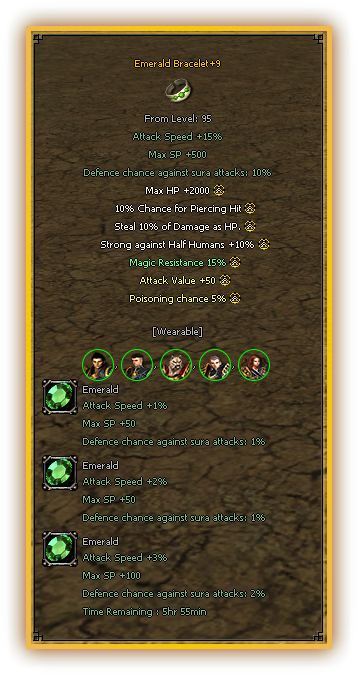
Three Paths to Stronger Equipment
Do not confuse these three systems. Each serves a different purpose and is handled by a different NPC.

Refinement (+0 → +9)
Upgrades your current item +0 through +9. On failure, the item is destroyed.
NOT a tier change — your item stays the same tier.

Transformation (Tier-Up)
Path A — 35% Success: Result +0, bonuses NOT transferred.
Path B — 75% Success: Result +9, bonuses ARE transferred.
Materials: The heart of a leader

Guaranteed Transformation (100%)
Same tier-up but 100% success. Bonuses and sockets PRESERVED.
Materials: Magic stone + Book of the Arts of Compromise + Miscellaneous fragments (precious)
Weapon Transformation Chain
Every weapon type follows a tier progression. Example uses Sword — same for all 7 weapon types.
| Step | Source Item (+9) | Result | NPC | Success | Materials | Bonus Transfer |
|---|---|---|---|---|---|---|
| 1 | Battle Sword +9 | Next Tier +0 | Weapons Merchant | 35% | The heart of a leader ×1 | No |
| 1 | Battle Sword +9 | Next Tier +9 | Weapons Merchant | 75% | The heart of a leader ×10 + Various Dungeon Requirements | Yes |
| 1 | Battle Sword +9 | Next Tier +0 | Seon-Pyeong | 100% | Magic stone ×2 + Book of the Arts of Compromise ×1 + Miscellaneous fragments (precious) ×50 | Yes |
| 2 | Tier-2 +9 | Lv105 +0 | Seon-Pyeong | 100% | Magic stone ×4 + Book of the Arts of Compromise ×3 + Miscellaneous fragments (precious) ×200 | Yes |
Weapon & Armor Upgrading — Seon-Pyeong
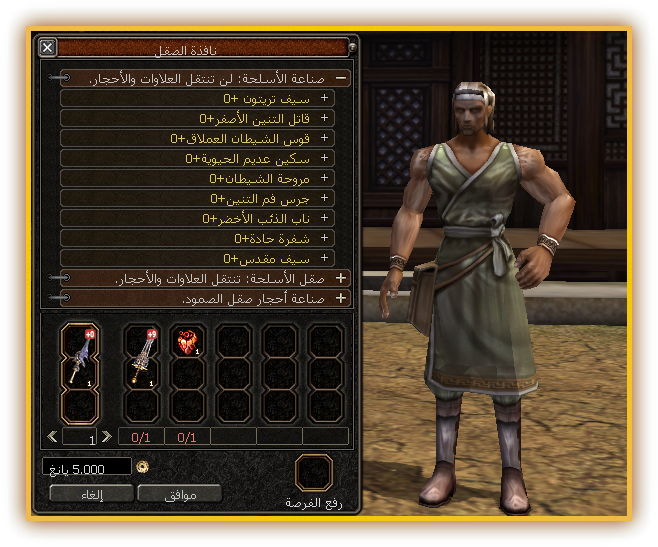
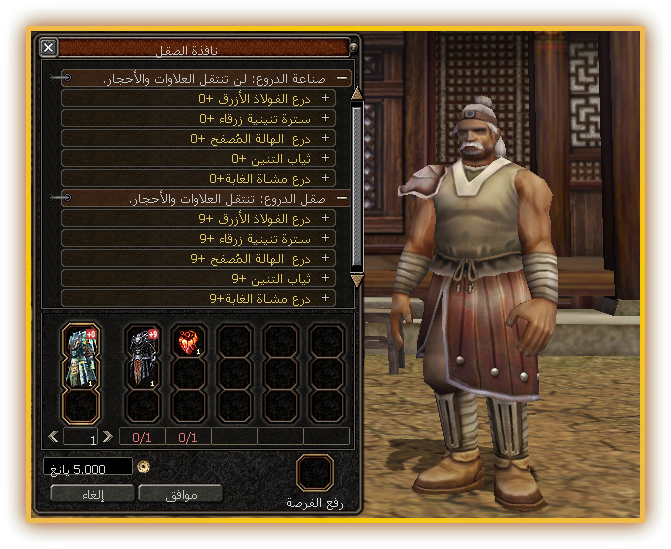
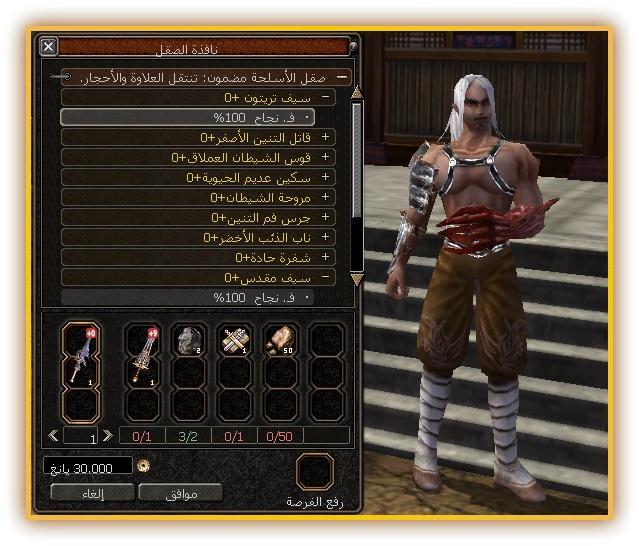
Lv105 Crafting — Four NPCs, Four Paths
Reaching Lv105 equipment is the endgame goal.
| NPC | Success Rate | Method | Bonus Transfer |
|---|---|---|---|
| Seon-Pyeong | 100% | +9 tier-2 weapon → Lv105 +0 | Yes — bonuses + sockets preserved |
| Admiral Angmur | 100% | +9 tier-2 armor → Lv105 | Yes — designed for bonus transfer |
| Jae-Seon Kim | 40-50% | +8 or +9 → Lv105 | Uses dungeon materials (cheaper but risky) |
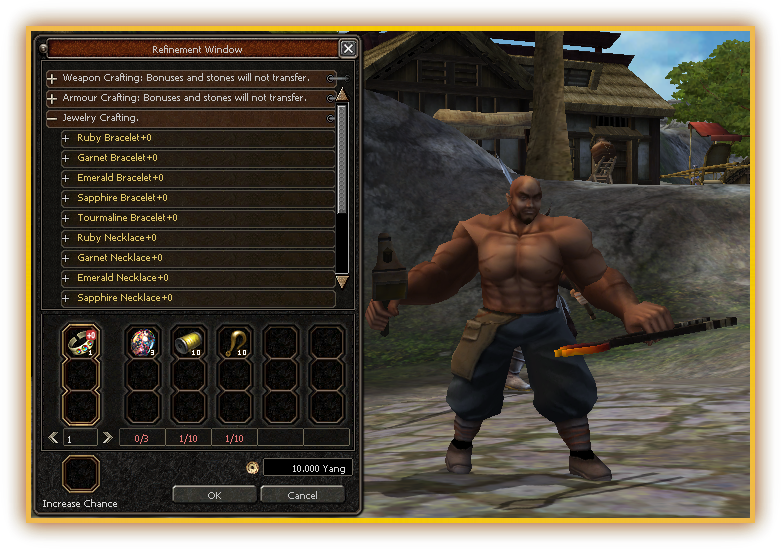
Level 105 Crafting Windows
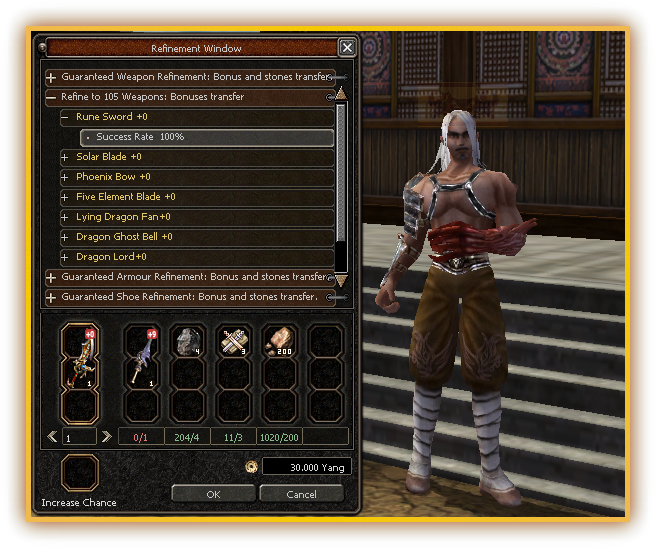
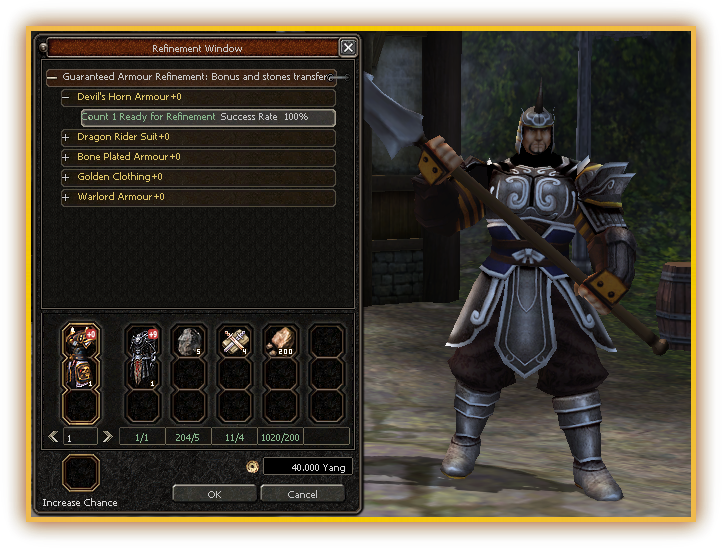
Weapon Resistance — Seven Defenses, One Slot
In most games, defending against every weapon type means spending seven separate bonus slots — one for Sword Defence, Two-Handed Defence, Dagger Defence, Arrow Defence, Bell Defence, Fan Defence, and Claw Defence. That is seven slots consumed just for defense.
This game consolidates all seven into ONE bonus: Weapon Resistance.
BEFORE — 7 Fragmented Defenses:
Sword Defence | Two-Handed Defence | Dagger Defence | Arrow Defence | Bell Defence | Fan Defence | Claw Defence
AFTER — 1 Unified Resistance:
Weapon Resistance — covers all 7 weapon types in a single bonus slot
Why this matters:
Six bonus slots are now free for other valuable bonuses — Max HP, Attack Speed, Casting Speed, Strength against Bosses, and more.
6th & 7th Bonuses — The Endgame Customization Layer
Once your item has all 5 normal bonuses filled, you unlock two additional epic slots. These are fundamentally different from regular bonuses.

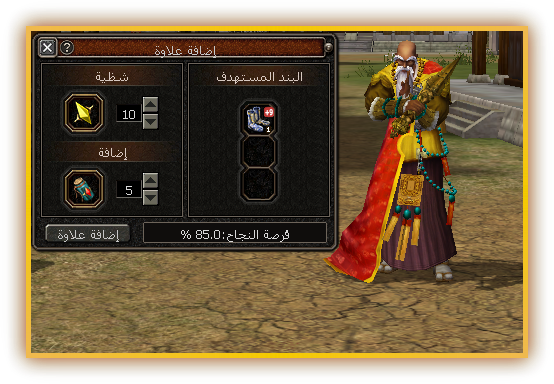
How It Works
Applies to: all nine gear types — from sword to talisman.
Managed by: Ling Dao, the Specialization Sage in the kingdom cities — collect the result from him.
Materials: at least one fragment — auto-selected by the item's level; each adds +3% success (up to 10 fragments = +30%).
Support items: four grades adding up to +55% extra.
The total: both stack together — your success chance can reach 85%.
Wait: 3 seconds.
Key rule: materials are consumed whether you succeed or fail.

Available Bonuses
Vitality, Intelligence, Strength and Dexterity live only in the Talisman — one talisman, one big decision.
Every skill of your class can be amplified on its own — stack bonuses into a single skill and forge an unforgettable strike.
Max HP stacks on all nine gear types — a solid foundation for any build.
The Shoes bonus carries the secret of the soul-steal the Sura enjoys in his enchanted blade.
The Complete Bonus Table — Slots 6 & 7

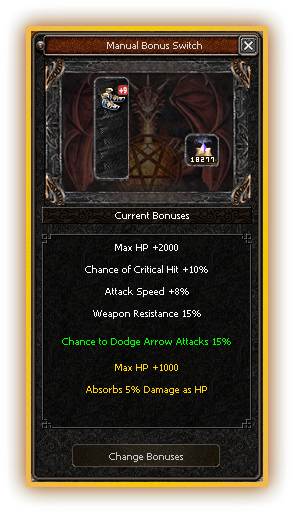
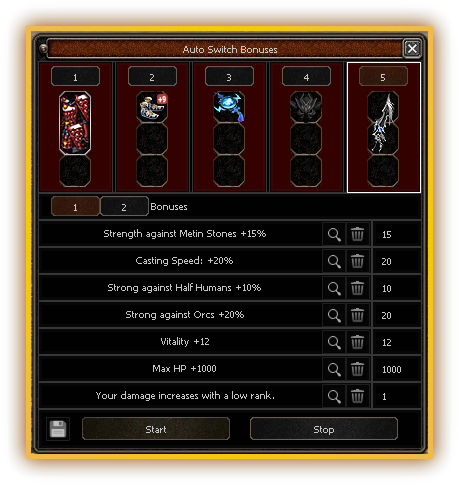
Bonus Switch Magic (Auto & Manual)

Change Look

Item Swap
Gear Switching — Four Ready Presets
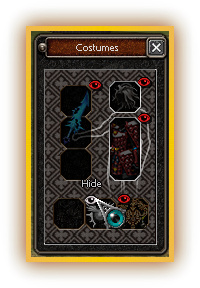
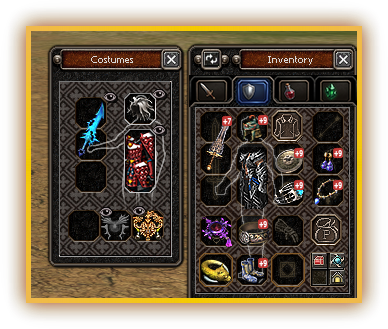
Gear, costumes and rings stored separately from the main bag — swap your whole set in one tap.
More Equipment Systems
- Shoulder Sash: Visible equipment with 4 quality grades. Absorbs bonuses from weapons/armor. Upgrade by merging two same-grade sashes at Ali Wahdan.
- Belt: Crafted at Yu-Hwan or Jae-Seon Kim. All inventory slots open from +1. Red Flame Stone in sockets increases bonus value.
- Aura: Costume-type with level/grade system. Absorb, Grow, Evolve operations. Max grade: Radiant.
- Dragon Alchemy: Enhancement system for additional power.
Beyond Simple Upgrades
These two systems are fundamentally different:
Refinement: Improves an EXISTING item. Blacksmith upgrades from +0 to +9. Same item, higher stats. Does NOT create a new item.
Crafting: Creates the NEXT equipment tier. Converts your current item into a fundamentally better one. Multiple NPCs — each with unique recipes and success rates. Crafted equipment comes out at +0 unless the path guarantees +9 transfer. Bonuses transfer ONLY where the specific path supports it.
What you can craft: Equipment transformation, Belts and sashes, Potions and elixirs, Mining gems, Seasonal items, Durability stones, Socket stones, Special items.
Key Crafting NPCs — Specialization Matrix
Each NPC specializes in specific crafting categories. Know who does what.

Yu-Hwan
Specialty: Basic belts + polish stones.
Crafts: Basic belts (+0, 100% success). Polish stones.

Baek-Go

Jae-Seon Kim
Specialty: Lv105 equipment + advanced belts.

Seon-Pyeong

Ling Dao
Services: Book extraction → Research Papers. Exchange for tools, skill books, Ghost Stones. 6th/7th attribute system. Powershard conversion.

Admiral Angmur
Specialty: Lv105 armor transformation with 100% bonus transfer.
Essential Crafting Materials

The heart of a leader

Magic stone

Book of the Arts of Compromise

Miscellaneous fragments (precious)

Research paper

Blessing Scroll

Soul Stone

Elixir of the world
Ghost Stones — Enhancement System
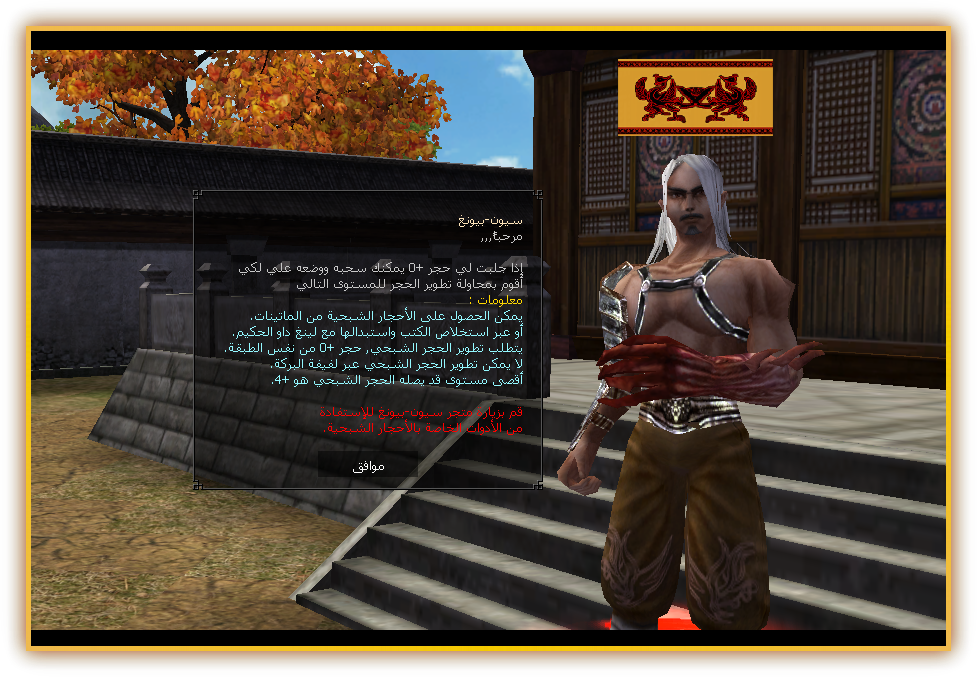
Ghost Stones are standalone enhancement items. They are NOT part of the normal cube crafting system.
Acquisition:
• Dropped from Metin Stones throughout the world
• Obtained through book extraction at Ling Dao
• Exchanged at Ling Dao using Research Papers
Upgrade Progression (managed at Seon-Pyeong):
+0 to +1 to +2 to +3 to +4 (Maximum)
Each upgrade requires a +0 Ghost Stone of the SAME tier.
Key Rules:
• Blessing Scroll CANNOT be used
• Maximum: +4
• Managed exclusively at Seon-Pyeong
Ghost Stones enhance the Dragon Book system, which grants permanent stat bonuses.
Ling Dao — The Specialization Sage
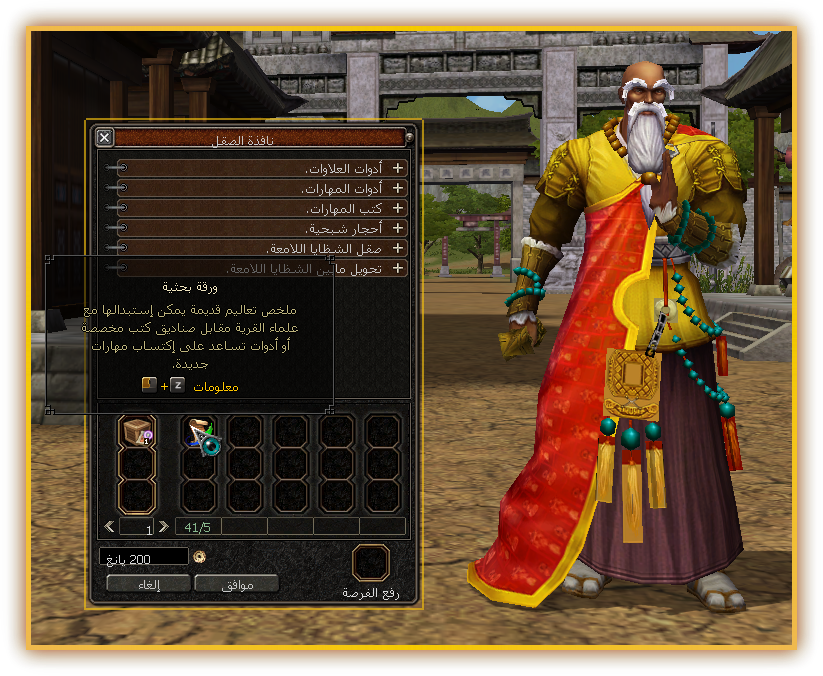
Ling Dao is the central hub for material conversion and advanced equipment enhancement. Located among the masters near the first villages.
What Ling Dao does:
1. Book extraction → Research paper
2. Research paper exchange → enhancement tools, skill books, Ghost Stones
3. Powershard conversion → raise or lower material tier
4. 6th/7th Attribute System → full management
Three Currencies
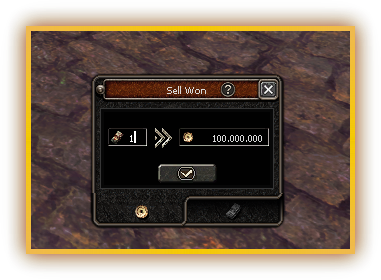
The Won exchange window converts between Yang and Won.
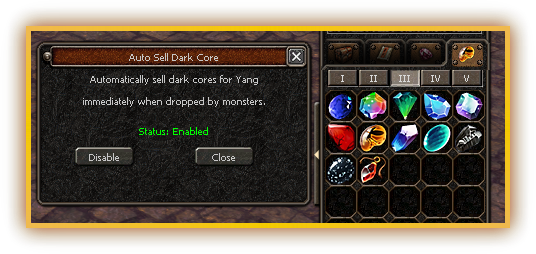
Every monster, Metin stone, and boss drops Dark Cores — a new and unique way to earn Yang. Designed first and foremost to control the game economy as an attempt to prevent inflation, it is also used to upgrade equipment.
12 tiers. Auto-sell toggle.

Offline Shop

Shop Search

Play More, Sell Longer
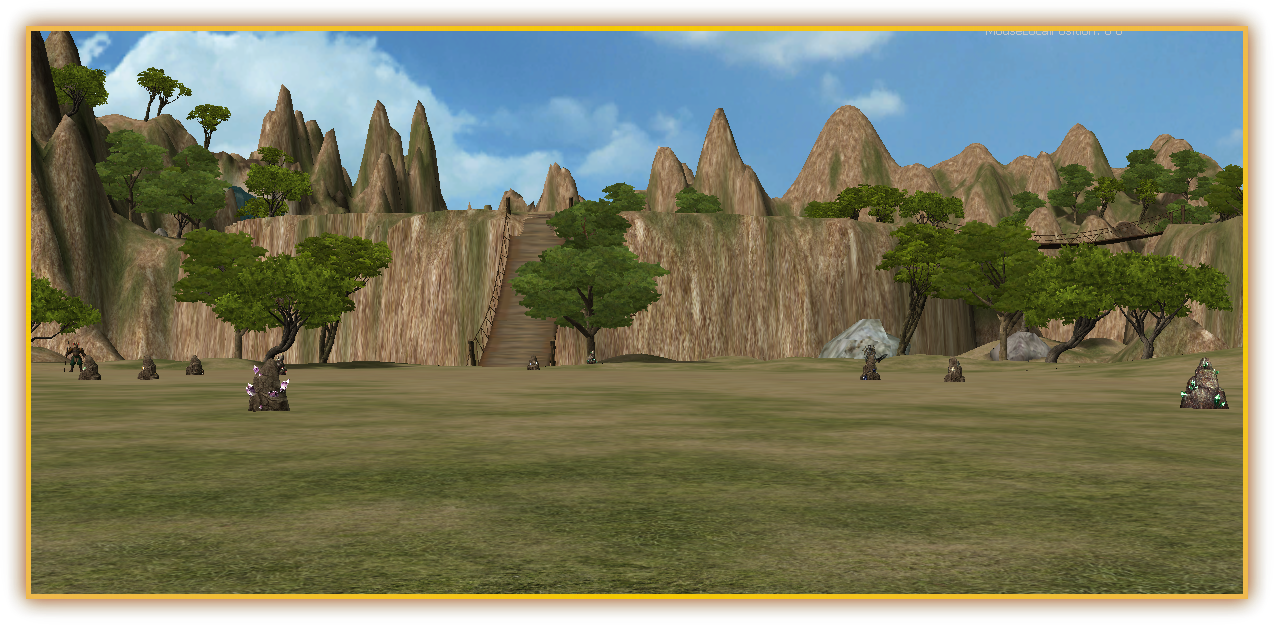
Mining is a relaxing side activity. The three union territories — Jungrang, Waryong and Imha — are unified as no-combat maps with no monsters, dedicated to prospecting and buying guild land. Upgrade your pickaxe at Deokbae and set out to gather ores.
Layers of Depth
Many systems await you: from costume bonuses to season-stone collecting, from the aura system to mining and fishing — each one adds a new dimension to your journey.
Costume Bonus Mechanics — Slots & Transfer
Each costume has 3 bonus slots with decreasing success rates. Transfer bonuses between costumes at Ali Wahdan.

Normal Bonuses (Slots 1-2)

Rare Bonuses (Slot 3)

Bonus Transfer

Costume Duration
Costume System — Look Good, Fight Better
Costumes are cosmetic equipment that provide both appearance AND combat bonuses. Three types, each with a dedicated bonus pool. All costumes last 10 days — except Battle Pass costumes, which never expire but require an active subscription.
The rare third bonus is drawn from one shared pool for all types — explore it in full below.
Costume Bonus Table — The Three Slots
Seasonal Stones — The Collection Loop
Seasonal Stones are the primary way to obtain costumes, companions, and weapon cosmetics.
ENTER DUNGEON → KILL MONSTERS → STONE DROPS → COLLECT 50 → VISIT KENJI → CHOOSE BOX → OPEN

The Four Seasonal Stones
Exchange at Kenji (50 stones → 1 box).
Cross-season conversion: 2:1 ratio.

Reward Categories
• Companion Box
• Hairstyle Box — hairstyle costume
• Armor Costume Box
• Weapon Costume Box
Specific costume exchange: 3 boxes → 1 specific costume (≈150 stones).
Additional Systems

Aura System

Mining
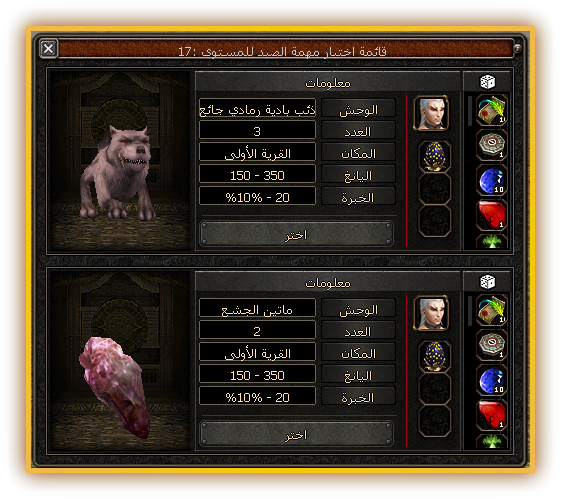
Hunting System — Ever-Renewing Hunt Missions
A hunting system that renews as you progress: each step assigns you a hunting mission against a target monster or Metin stone — kill the required count to claim Yang, EXP, and valuable item rewards.
Track your progress from the mini mission window wherever you go, and claim your rewards with one click. Missions scale with your growth path, accompanying you on your journey all the way to the end.
Where the Real Challenge Lives
Over a dozen dungeons span the continent, each with unique mechanics, bosses, and rewards.
What dungeons give you:
• Equipment materials (The heart of a leader)
• Seasonal Stones for costume crafting
• Enhancement materials (Horse Medals)
• Exclusive boss boxes with rare equipment
Most dungeons can be entered solo — a hard challenge solo lovers will be proud to overcome. The exceptions: the last two towers, Red Dragon Castle and Nemere's Watchtower, currently require a group — plus the guild dungeons, which are group content by nature.
Dungeon Comparison Matrix
| Dungeon | Level | Type | Floors | Drops & Perks at a Glance | Tower Smith |
|---|---|---|---|---|---|
| Monkey Tower | Any | Solo/Party | 2 stages | Horse Medals, Seasonal Stones | — |
| Demon Tower | 40+ (70+ upper) | Solo/Party | 9 floors | Silver Horse Medals, skill books, Reaper | ✓ |
| Orc Maze | 30-60 | Solo or Party | 3 stages | Early-game group content | — |
| Spider Lair | 50+ | Solo or Party | 2 steps | Spider Baroness | ✓ |
| Dead Crypt | 75+ | Solo or Party | 7 floors | Azrael, Tartaros. Ticket: Shrunken Head | ✓ |
| Beran-Setaou | 95+ | Solo or Party | 2 stages | Dragon boss. Ticket: Twisted Key | ✓ |
| ★ Razador — Red Dragon Castle | 100-105 | Group only | 7 floors | Dragon weapon materials — multi Treasure Chest | ✓ |
| ★ Nemere's Watchtower | 100-105 | Group only | 10 floors | Dragon armour materials — multi Treasure Chest | ✓ |
| Guild Palace | 70+ | Guild only | 5 tiers | See Guild section | — |
Tower Smith — Yang-Only Upgrades
After the final boss falls in six of these towers — Demon Tower, Spider Lair, Dead Crypt, Beran-Setaou's chamber, Razador's Red Dragon Castle and Nemere's Watchtower — one of the three tower smiths appears at random: the weaponsmith, the armoursmith or the jeweller. It upgrades your gear for yang only — no material requirements at all.
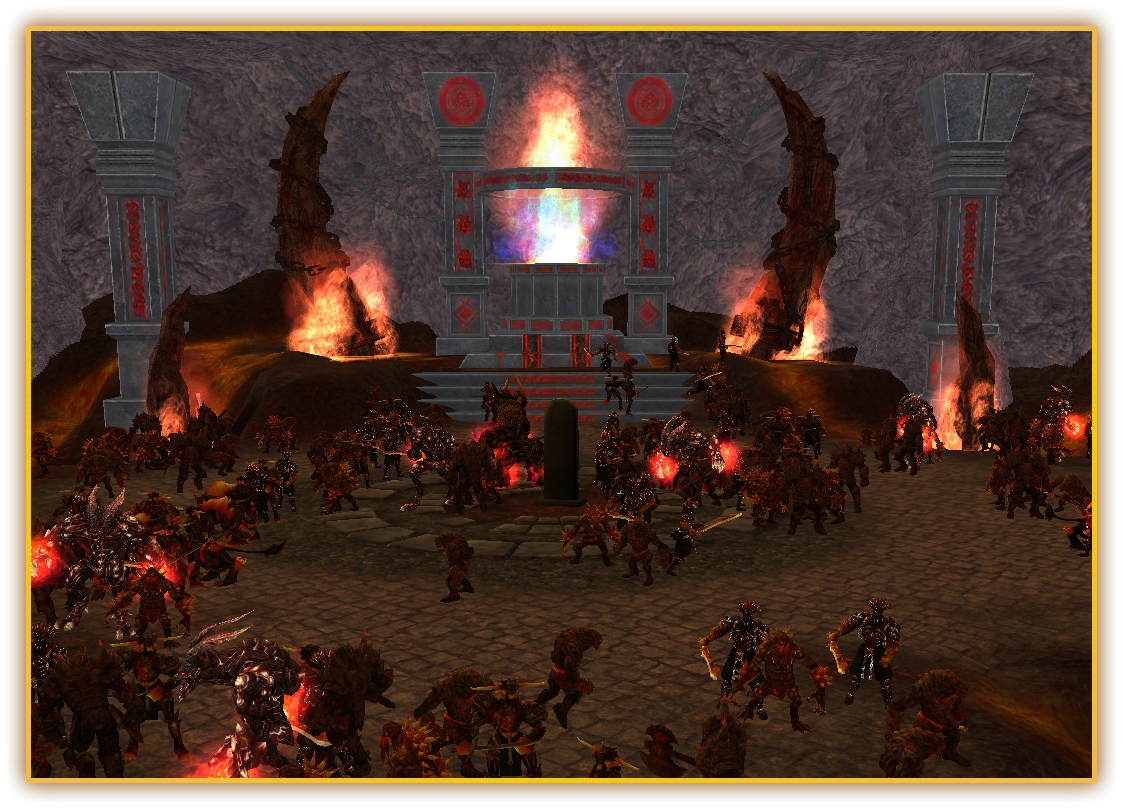
Razador — Red Dragon Castle
The Red Dragon Castle is the ultimate endgame challenge for max-level players — and the source of every Gloom Dragon weapon material (level 96). Seven floors of escalating difficulty culminating in the Razador boss fight.
Level: 100-105 | Access: Solo or Party — pass card | going solo is a hard challenge | Floors: 7 | Cooldown: 1 hour | Time limit: 60 minutes
Gateway: Fireland Guard in Doyyumhwan — your first entry card is free
Floor progression:
1. Kill all monsters
2. Kill until Golden Cog Wheel drops → place on correct pillar
3. Kill all monsters
4. Kill Ignitor
5. Kill until Maat Stones drop → place on all 7 pillars
6. Destroy Purgatory Fire Metin
7. Kill Razador
What you farm here:
• From tower monsters: Anvil, leather and thread — the base of every weapon recipe
• From Ignitor (Floor 4): Dragon's Tooth, Steel and Abrasive
• From Razador (final floor): all eight weapon designs, Razador's Horn, and the Razador Dark Box packed with weapon materials
After the run: take your materials to the Weaponsmith Statue in Cape Dragon Fire to craft your +0 weapon, then refine it at any Blacksmith up to +15.
Hell Gates appear on Floor 2 as a destructible obstacle — destroy them to clear a path.
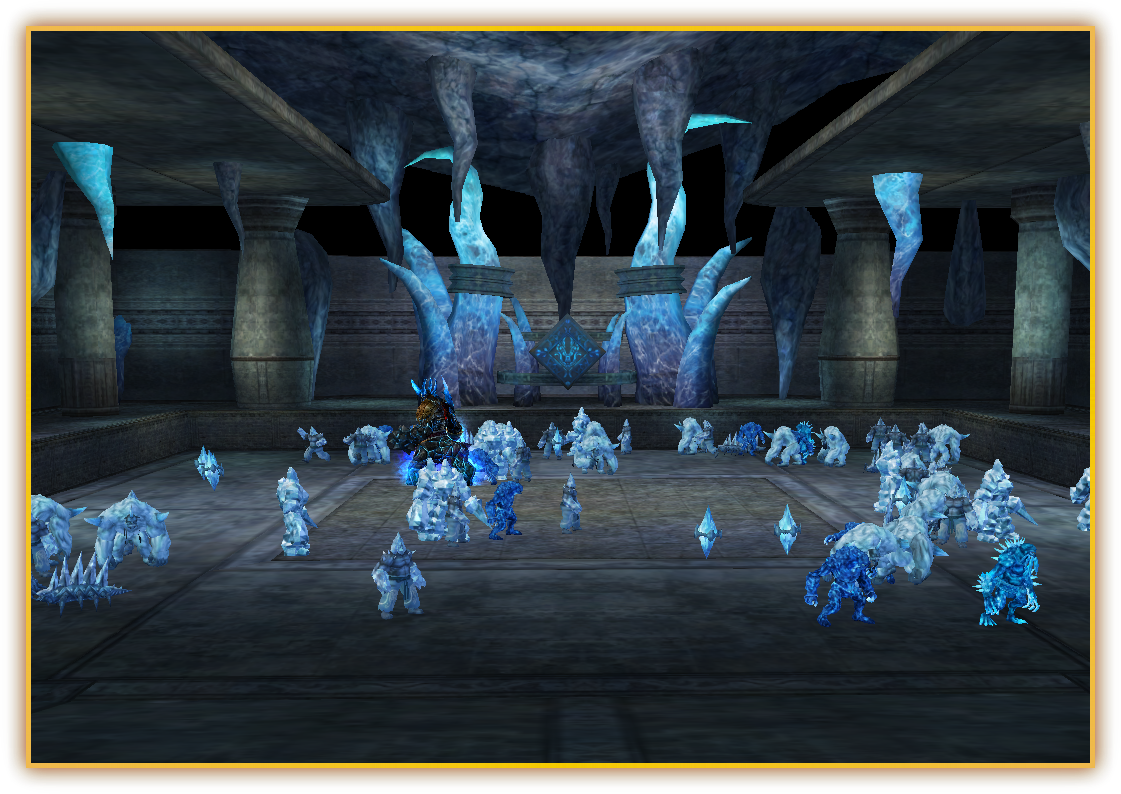
Nemere's Watchtower
Nemere's Watchtower is an endgame dungeon that currently requires a group — and the source of every Dragon armour material (level 96). Ten floors of ice-themed challenges.
Level: 100-105 | Access: Group only — pass card | Floors: 10 | Cooldown: 1 hour | Time limit: 60 minutes
Gateway: Ice Land Guardian in Mount Sohan
Key floors:
1. Kill all monsters
2. Kill until Frost Key drops → activate
5. Kill until North Stars drop → place on polar cubes
6. Destroy Frost Metin
7. Kill correct Sizel
9. Destroy North Dragon Pillar → click Ice Lion
10. Kill Nemere
What you farm here:
• From tower monsters: Common Leather, Cloth and string — the base of every armour recipe
• From Sizil: Dragon Skull and Medal of Honour
• From Nemere (final floor): all five armour designs, Nemere's Horn, and the Dark Panther Box packed with armour materials
After the run: take your materials to the Armoursmith Statue in Cape Dragon Fire to craft your +0 armour, then refine it at any Blacksmith up to +15.
Dark Dragon Gear — The Continent's Finest Craft
The secret of the last two towers is not a treasure to pick up — it is a craft to be made: Razador, lord of flame, hoards the weapon materials; Nemere, lord of frost, hoards the armor materials. From the loot of their bosses comes the mightiest gear in the game, rising all the way to +15.
CLEAR BOTH TOWERS → GATHER MATERIALS AND DESIGNS FROM THEIR BOSSES → DRAGON FIRE HEAD: THE TWO SMITH STATUES FORGE YOUR GEAR +0 → THE REVIVAL STONE DECIDES YOUR ODDS → THE BLACKSMITH REFINES UP TO +15
Dark Dragon Weapons
Eight weapons for every class — materials from Razador's tower.

Warrior Sword

Sura Greatsword

Ninja Dagger

Ninja Bow

Warrior Blade

Shaman Bell

Shaman Fan

Lycan Claw
Dark Dragon Armors
Five armors — materials from Nemere's tower.

Warrior Armor

Ninja Armor

Sura Armor

Shaman Armor

Lycan Armor
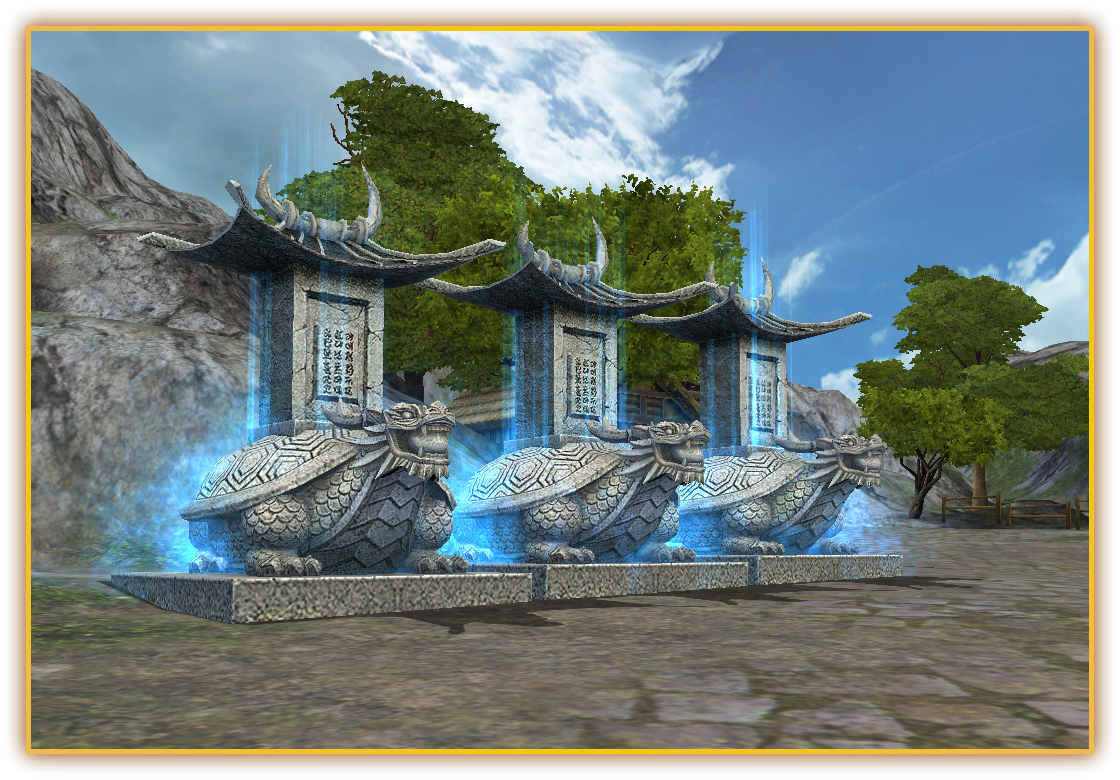
Boss Chests
The finest dungeon loot: exclusive chests dropped by the mightiest bosses of the game — each boss has his own chest and treasures.

Razador Dark Box

Dark Panther Box

Stubborn Spirits Box

Box of Legends

Titans Box

Masters Fund

Loot Box

Grim Reaper Box

Azrael Fund

Spider Baroness Chest

Beran-Setaou Dragon Box

Razador's Chest

Nemere's Chest
Event Chests
Seasonal treasures and event rewards: the four season chests with their varied rewards, quest chests, and treasure event chests.

Regular Quest Box

Rare Quest Box

Mythological Quest Box

Winter Companions Box

Winter Hairstyle Box

Winter Armour Costume Box

Winter Weapon Costume Box

Spring Companions Box

Spring Hairstyle Box

Spring Armour Costume Box

Spring Weapon Costume Box

Summer Companions Box

Summer Hairstyle Box

Summer Armour Costume Box

Summer Weapon Costume Box

Autumn Companions Box

Autumn Hairstyle Box

Autumn Armour Costume Box

Autumn Weapon Costume Box

Moonlight Treasure Chest

Hexagonal Treasure Chest

Blessing Chest

Traveler's Fund

Al Hilal Fund

Triple Box
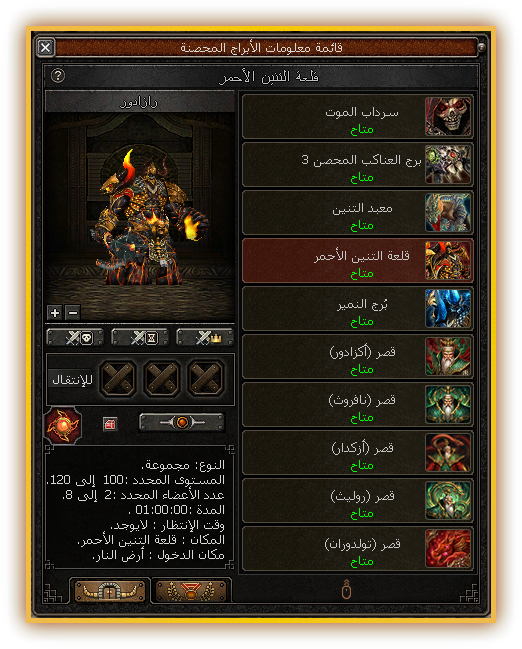
Every dungeon has a built-in information panel showing live rankings, teleport options, and drop tables. Find your group, teleport directly, and track your progress.
- Auto-hunt is disabled inside dungeons — keeping them challenging
- Bonus damage against bosses also works on Metin stones.
- Safe restart — disconnect in a dungeon places you at a safe location
- High-level maps (Lv90+): Cape Dragon Fire, Gautama Cliff, Nephrite Bay, Thunder Mountains
The Ultimate Guild PvE Challenge
A guild is more than a tag over your head — a shared warehouse and bank, collective growth, and wars that forge your standing.
Its greatest reward: the Dragon King's Palace — a challenge unlocked only by the strength of your guild dragon.
Guild — Strength in Numbers

Guild Storage & Bank

Guild Progression

Guild Dragon Power
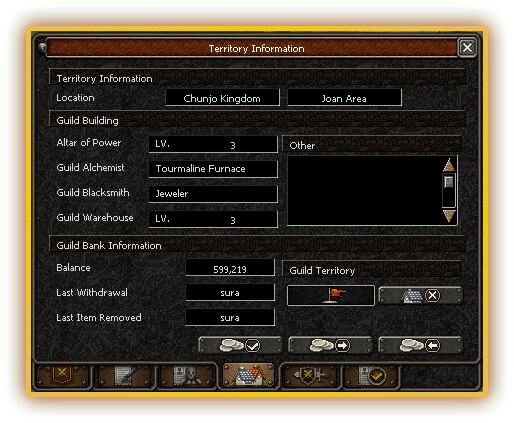
The Dragon King's Palace is an exclusive guild-only PvE instance on a dedicated map. Five tiers of escalating Dragon King bosses test your guild's coordination, gear, and strategy.
Entry Requirements:
• Must be a guild member
• Guild level scales by tier (Lv21 → Lv35)
• Player level: 70-120
• 1-90 members per entry
• Duration: 60 minutes
• Entry through Medal Keeper in guild villages
• Requires Royal Key — quantity scales by tier
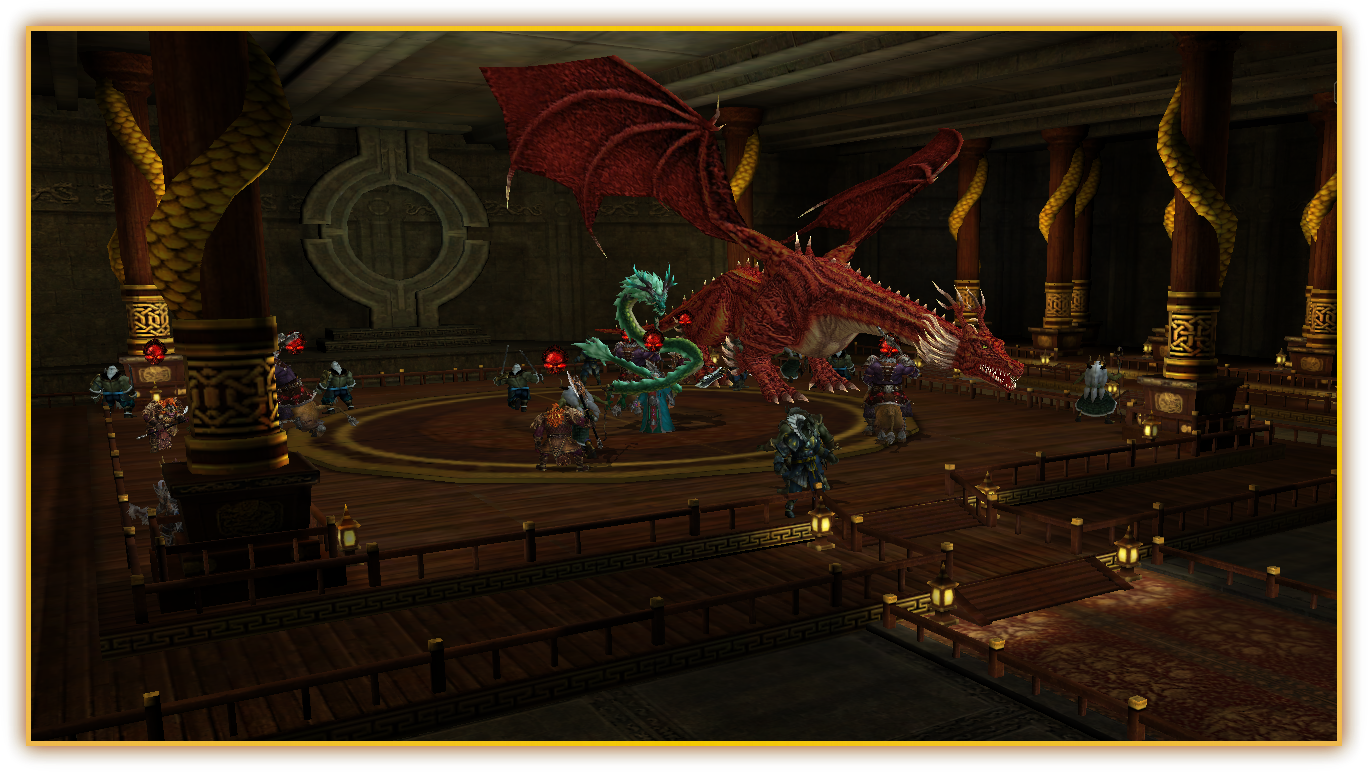
Five Tiers of Dragon Kings
Drops at every tier: Elemental Scrolls, Donation Memoirs, guild EXP for participants, and Exedyar's Egg.
| Tier | Guild Level | Boss | King's Keys |
|---|---|---|---|
| 1 | 21 | Dragon King Akzadur | 1 |
| 2 | 24 | Dragon King Nafaroth | 3 |
| 3 | 27 | Dragon King Exedyar | 5 |
| 4 | 30 | Dragon King Ruilith | 7 |
| 5 | 35 | Tyolduran | 10 |
Entry Systems — Keys, Guardian, Scrolls

Royal Key Crafting

Medal Keeper

Elemental Scrolls

Sequential Progression

Dragon Power (GP)

Group Strategy
Ride, Fight, Grow
Your horse is not transportation — it is a combat companion that grows with you from level 1 to 40, crowned by a fourth and final grade: the Mighty Warhorse.
Rent your horse from the Stable Boy and ride out: four bonus slots that open as you progress, a registry of 47 mount forms to swap between anytime, and a floating rider window that stays with you everywhere.

The Floating Rider Window

Four Bonus Slots

47 Forms — Swap Anytime
Horse Stat Bonuses by Level
Each bonus lives in a single slot only, and its value upgrades automatically when the next tier is reached — no re-picking needed.
| Tier | Horse Level | Options | Top Bonuses |
|---|---|---|---|
| Tier 1 | Lv1-10 | 6 | vs Monsters 5% • Attack +50 • EXP +5% • HP +500 • vs Metins 5% • vs Bosses 5% |
| Tier 2 | Lv11-20 | 6 | vs Monsters 10% • Attack +100 • EXP +15% • HP +1500 • vs Metins 10% • vs Bosses 10% |
| Tier 3 | Lv21-30 | 11 | Monsters 15% • Attack +150 • EXP +20% • HP +2500 • Metins/Bosses 15% • vs Classes +8% |
| Max | Lv31-40 | 12 | Monsters/Metins/Bosses 15% • Attack +200 • EXP +30% • HP +3000 • vs Classes +12% • HP Restore on Damage 5% |
Tower-Exclusive Forms
Clearing towers unlocks mount forms that cannot be bought with Yang or medals — they are earned by glory alone:
- Demon Tower: the Dark Hell Horse and the Cursed Broom
- Spider Lair: the Forest Tiger
- Dead Crypt: the black and golden Night Terrors
- Beran-Setaou: Lightning and Thunder
- Nemere's Watchtower: the Snow Tiger, Comet, and the Blizzard Reindeer
- Razador — Red Dragon Castle: the Fire Unicorn and the Fire Lizard
- Guild Palace: the Dragons of Rest and Suffering
- Clear all seven towers to ride the gleaming Twilight Phoenix — and reach level 40 for the glowing Dusk Phoenix
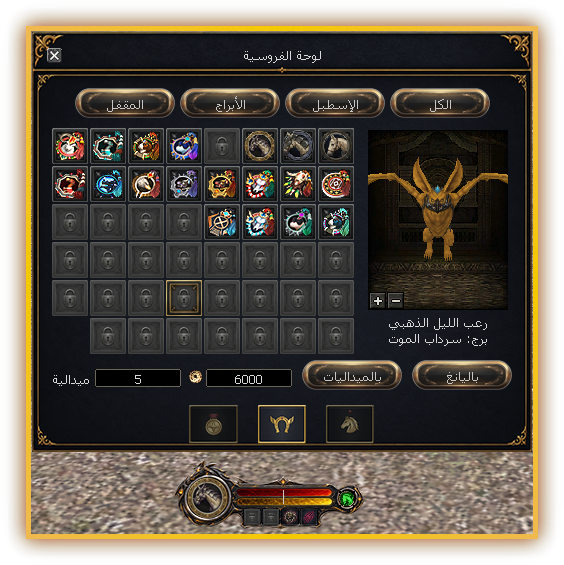
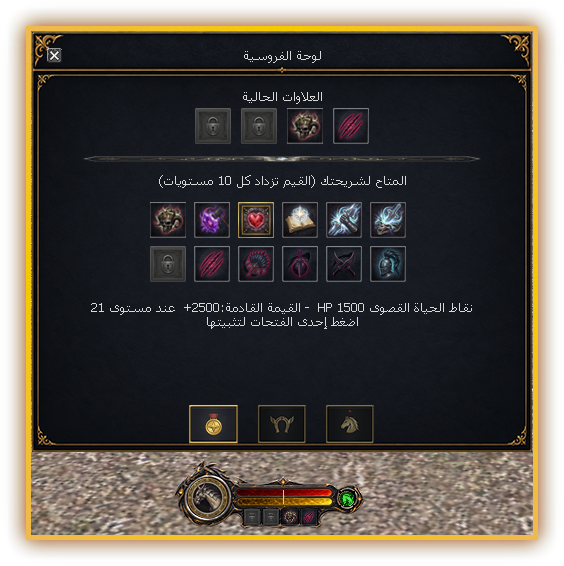
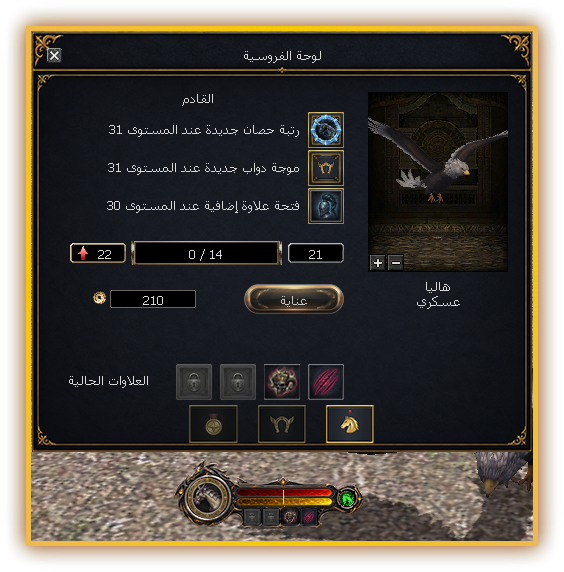
The server has two kinds of companions, each with its own rules: the Growth Companion begins as an egg you hatch and name, then grows with you level after level into a full battle beast; the Tool Companion is ready the moment you summon it, with fixed bonuses and a duty nothing else performs: picking up your loot.
Both follow you into the field, and both count as your strength.

The Growth Companion

The Tool Companion

Combat Points & Skills
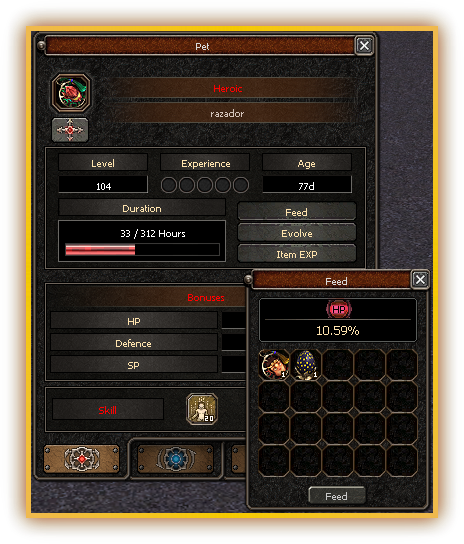
Sequential Evolution — Lower Stages Prepare the Higher
The growth companion passes through four stages: Young, Wild, Fierce, then Mighty. Each stage unlocks higher levels and wider slots, and the final evolution demands more than materials — it requires a companion mature enough to have lived long at your side. The third skill slot opens only at the highest stages.
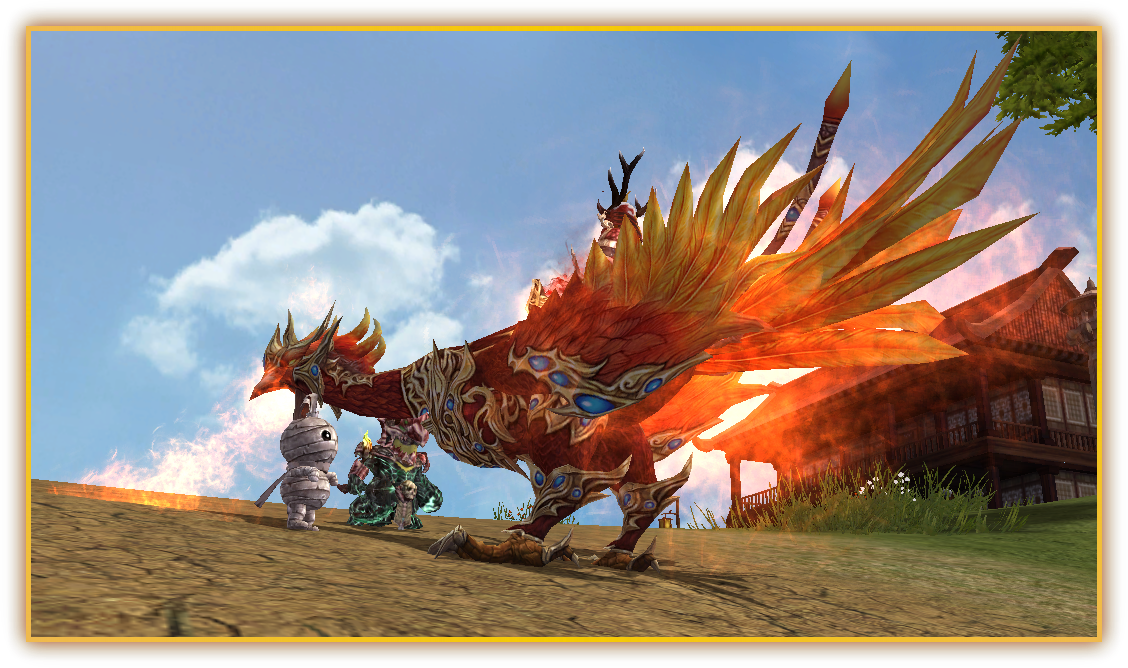
It Picks Up Your Loot
The tool companion's unmatched trait: it scans around you, picks up what dropped from your own kills, and delivers it to your inventory — in a steady mode or the faster, wider Catch-All mode. And it respects the loot filter you set: it never touches what you excluded.
How to Get Your Companion
Many channels — from boss fights to Kenji's stock:
- Growth eggs drop from specific bosses: the Monkey Boss, the Spider Baroness, Razador, Nemere, Beran-Setaou, Meley, and Azrael's group
- The rare Exedyar egg drops from the five Dragon King's Palace bosses
- At Kenji: 50 seasonal stones → the season's Companion Box
- Also at Kenji: 3 companion boxes → the exact companion you choose
- The Companion Box grants a random growth egg from six types
- More companions through shop and event boxes
Permanent Power Through Dedication
The Biologist Research is one of the most rewarding long-term progression systems. By collecting monster specimens and delivering them to the right NPC, you earn PERMANENT character bonuses that never expire.
Two Researchers, Two Roles:
• Levels 30-90: Deliver to Biologist Chaegirab → choose reward at Baek-Go
• Levels 92-94: Both delivery AND reward at Seon-Pyeong
The Research Flow:
COLLECT items → DELIVER one at a time → SUCCESS (count +1, deliver again immediately) or FAILURE (5-min cooldown) → after 15 deliveries → HUNT specific boss → CHOOSE ONE permanent bonus.
Each level requires exactly 15 successful deliveries. With the Elixir of the world, a dedicated player can complete a level in a single session.
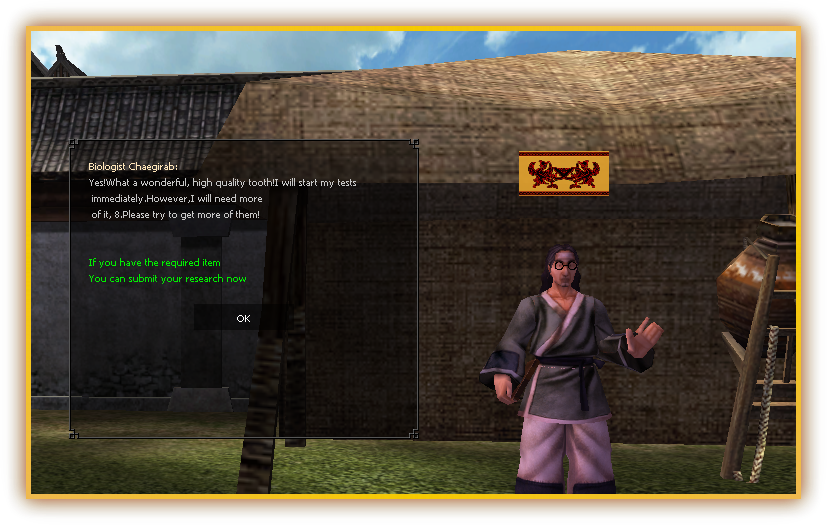
Complete Research Levels & Reward Choices
Every research level gives you a choice of permanent bonuses. Choose carefully — these last forever.
| Level | Item to Collect | Drop Source | Reward Choices (pick ONE) |
|---|---|---|---|
| 30 | Orc Tooth | Ghouls in Monkey Dungeon | +10 Move Speed / +10 Cast Speed / +10 Attack Speed |
| 40 | Curse Book | Dark cult mobs & Orcs | +20 Attack / +10 Magic Attack |
| 50 | Demon's Keepsake | Demon soldiers | +5 INT / +5 STR / +5 DEX |
| 60 | Ice Marble | Ice monsters | +25 Attack / +10 Poison Resist |
| 70 | Zelkova Branch | Ghost trees & Dryads | +10 INT / +10 STR / +10 DEX |
| 80 | Tugyi's Tablet | Destroyers & Warriors | +5 Strong vs Human/Warrior/Assassin/Sura/Shaman/Lycan |
| 85 | Red Ghost Tree Branch | Red ghost trees | +5% Resist ALL classes / +5% Strong vs ALL classes |
| 90 | Leaders' Notes | 13 boss-class mobs | +8 Strong vs Stones / +8 Strong vs Monsters |
| 92 | Malevolence Jewel | Hell Ice mobs | +30 Attack / +10 HP Regen |
| 94 | Wisdom Jewel | Saitao mobs & bosses | +5% Normal Hit Damage/Defense / +5% Skill Damage/Defense |
Research Tools & Reward Reset
Elixir of the world
Usage: One per delivery attempt. Use BEFORE submitting.

Reward Reset System
Reset Item: Red monocle — from General Store.
How: Talk to statue with item → ALL bonuses removed → re-choose each level.
Restrictions: ONE reset per character ever. ONE re-claim per level. Non-selective — cannot reset just one level.
Systems That Respect Your Time
Every convenience you'd expect from a modern MMO — and then some.
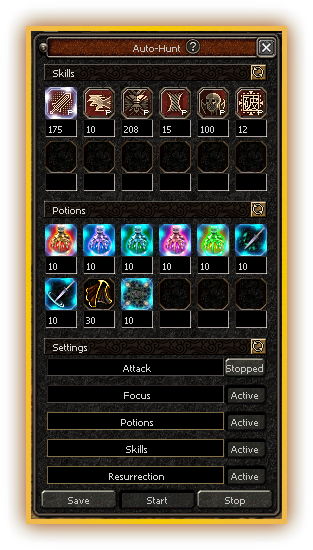
An advanced auto-hunt system supporting permanent elixirs and the Bravery Cape — the cape only activates when monsters are nearby, so it is never wasted. A smart navigation system also frees your character from obstacles automatically whenever you hit a dead end or collide with something.
General Improvements

Unified Inventory

FPS Selection

Fast Stack/Split

Sell on Destroy

Stack on Buy

Safe Delete

Window-to-Window

Extended Safebox

Loot Filter

High-Quality Fullscreen

In-Game Wiki

Bonus Switch Magic (Auto & Manual)

Presets

Auto Book Reading

Map Transitions

Keyboard Customization

Channel Switcher

EXP Control

Auto Pickup

Experience Toggle

Metin Farm Queue
- Vote4Buff — earn buffs by supporting the server
- Teleport panel — fast travel
- Anti-multi-farm — logging in with multiple accounts is allowed, but only two accounts per machine earn item drops — and you choose which two.
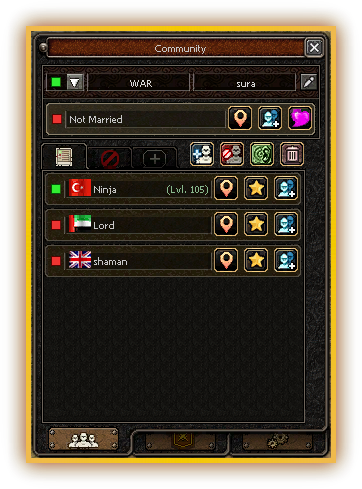
Enhanced Community Window
The enhanced community window gathers many settings in one place, and gives you:
• See your friends' status
• See where they are
• An alert when a friend or a guild member comes online
• Write your own personal status text
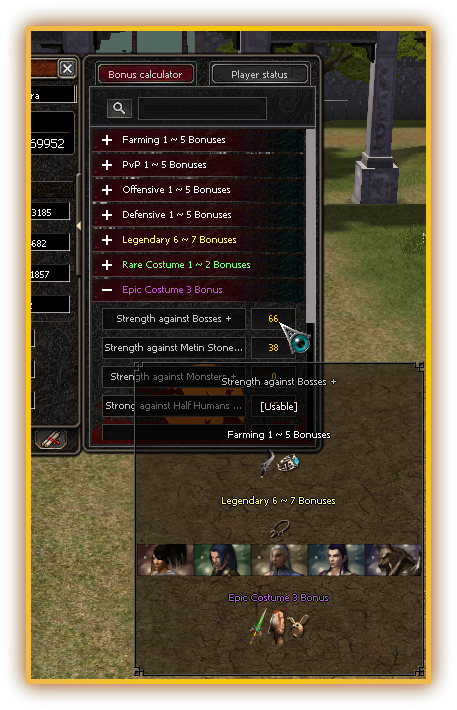
Bonus Calculator
The advanced bonus window inside your character window: browse all your bonuses sorted and categorized, and inspect every equipped piece in detail.
The perfect tool for planning your gear and reviewing what you are missing before investing in upgrades.
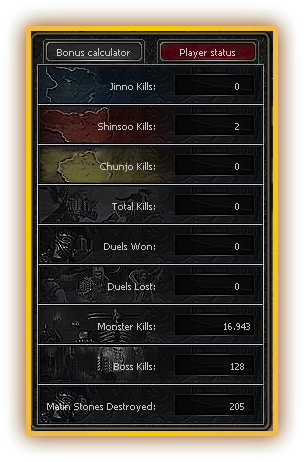
Kill Statistics
A player-status page inside the character window: counts of monsters, Metin stones, and opponents you have defeated — your personal achievement record in numbers, daring you to break your own records.
Always Something Happening

Kingdoms War

Arena Tournament

OX Event
Events run automatically on a fixed schedule. Weekly: Sky Blessing boosts EXP and drop rates (Sun/Tue/Thu/Sat, 20:00-22:00). Treasure chest drops rotate nightly. Sash crafting materials drop Mon/Fri. Metin-only farming maps open 8 times daily. Daily spin wheel rewards. Seasonal content runs year-round — four stone seasons and themed events.
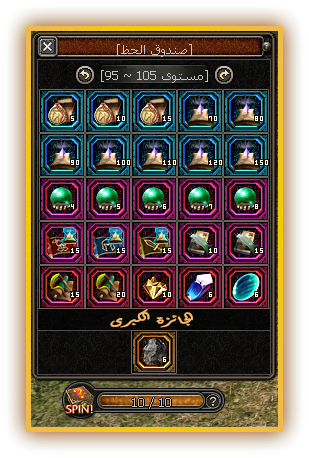
Lucky Spin Wheel — Fortune Spins Every Day
A permanent fixture in the server schedule built on Metin stones: their count in the world is modest, but they respawn quickly — the effort needed for your spins stays reasonable, and the prizes are valuable enough to be worth every turn.
Schedule: eight daily sessions, alternating with the Meteor Attack event around the clock — two hours of attack, then one hour of luck.
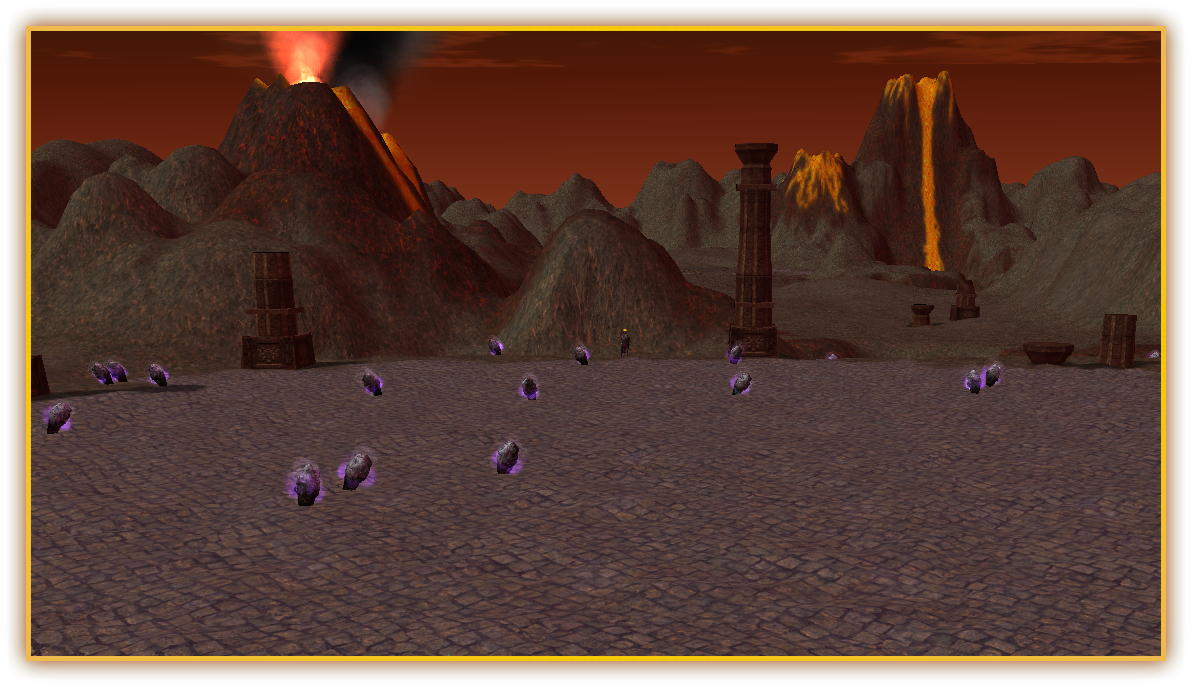
Meteor Attack — The Metin Maps
The flagship event for Metin lovers: when it begins, gates open to exclusive Metin-farming maps rich with stones. Teleport through the gate guardian from towns and main maps straight into the heart of the event and harvest.
Schedule: eight daily sessions, every three hours, two full hours each — alternating with the Lucky Spin Wheel around the clock.
Cosmetic & Convenience, Never Power

Game Shop

Battle Pass

Subscription
Donating supports the server — and the devs repay it with a look no one forgets. Donor membership is fully cosmetic and convenience: zero combat power, distinction everyone can see.
• An animated badge above your character in your card's color, plus the [Donor Player] title in a distinct chat color
• A special badge and colored name in the player rankings
• 180 emotion bags instantly on activation + the season challenge card for free
• Unlimited skill color changes, and Battle Pass costume bonuses for the whole subscription
• In a party: 10% extra EXP for every member — pauses when the membership ends, returns on renewal
Cards: 90 / 180 / 360 days — and they are giftable.

The Donation Badge — 90 Days
The first tier of giving: an animated badge blinking above your character as the camera circles it — in the 90-day card's color with its own symbol.

The Donation Badge — 180 Days
Greater giving, greater glow: the 180-day card's badge shines above your character across every map of the continent.

The Donation Badge — 360 Days
The full-year badge: the highest tier of support and the most brilliant shine — for those who wear the year-long donation with pride.
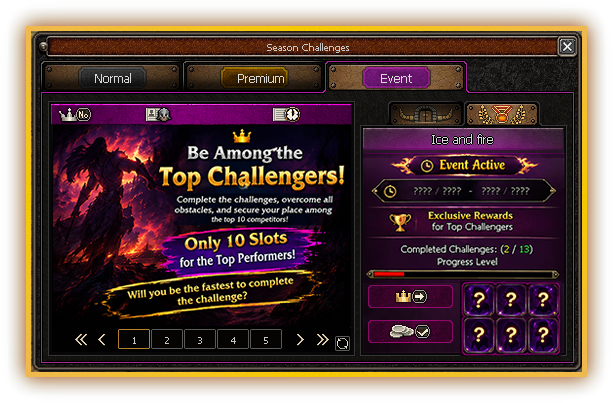
Season Challenges — An Achievement You Wear
Every season is a timed quest chain, from level 30: slay monsters, bosses, and players; craft, upgrade, and gather; catch and grill rare fish — and every completed quest pays its reward instantly.
Three types await you:
• Regular Challenges — free for everyone: complete them all to wear the season's unique set: armor costume, helmet, hairstyle, and weapon costume. A set that cannot be bought or gifted — it is born from your achievement alone, and stays yours with no expiry.
• Premium Challenges — a shop card unlocks the second track: different quests, different rewards, and another unique set unlike the regular one. Finish both tracks and leave the season with two full exclusive sets.
• Event Challenges — opened suddenly by the admins outside the season schedule: every challenge carries an instant prize, and clearing them all grants special, valuable final rewards — with Dragon Coins possibly awaiting the fastest.
Every costume in the game expires — except the two Season Challenge sets: earned only in their own season, never offered again, and yours forever.
Why This Game Feels Different
Levels 90-105 — Meaningful Quests, Not Forced Grinding

The Quest Engine

What This Means
Heritage Reborn
The spirit you remember, refined for a new era. A world rebuilt from the ground up — where adventure grows wider, experience runs deeper, and every step leaves its mark.
This is a new beginning. The server and database were reset — this is a fresh relaunch, not a continuation of a previous season.
We carried forward years of development experience. We kept what made the world worth returning to, refined what needed improvement, and rebuilt the systems that shape your daily journey.
Our direction is clear: meaningful progression and systems with purpose. Player feedback will shape what comes next.
The world will continue to grow, but it will never forget where it began.
A new page opens now — and its first chapter is written with the names of those present at its beginning.